
This is only for creating the boilerplate structure for the micro front end – it does not have any specifications for UI code requirements.
Repository
You will need a Bitbucket account to access the below respositories.
Remote Flow Client Dashboard: kman-client-microfrontend
Setup folders and files
- Create the folder name for the micro front end (should be specified)
- The folder should be based on the dashboard section (databank, timeflow, workflow, settings, billing etc.) and module name (specified in the brief)

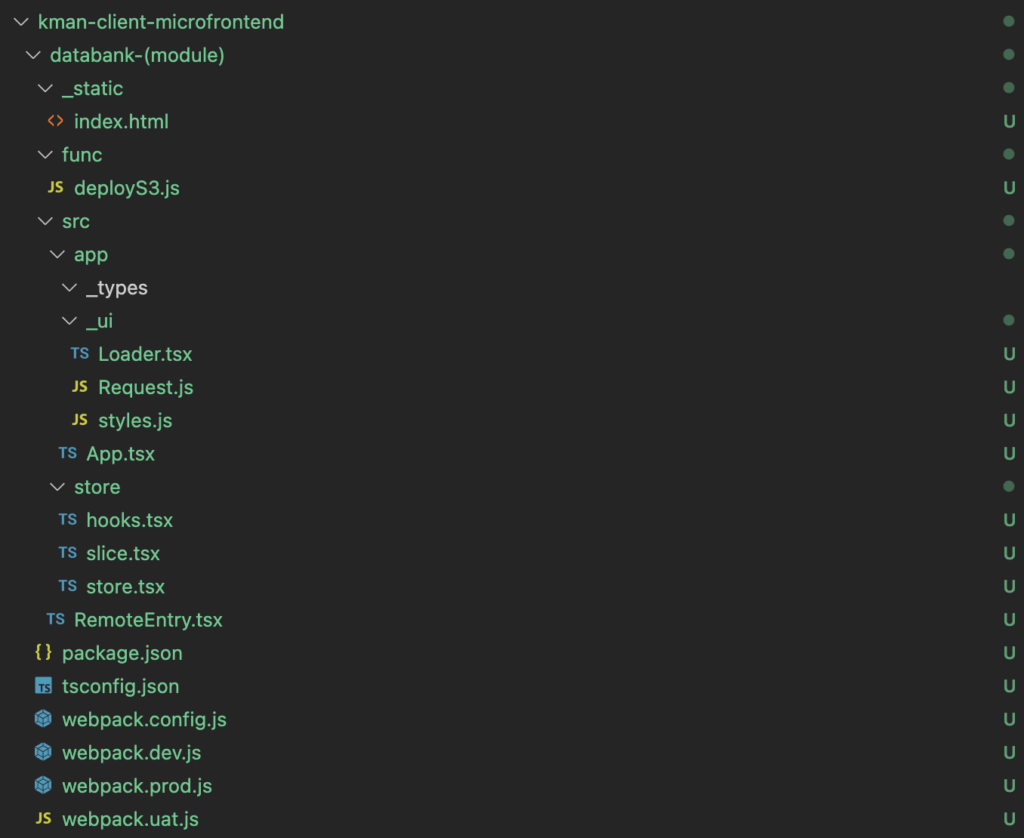
Add the folders and files
- These can by copied and pasted from a previous micro front end
- The below files are the minimum files required
- Use the same structure from previous micro front ends – they are tightly coupled with kman-client-webapp
- All all your component files to the /src/app directory
- _types folder is for the Interfaces / Types – you will be copying them from kman-client-webapp
- _ui folder is for UI libraries used in kman-client-webapp
Update the webpack config files
In the webpack.{env}.files, there is a variable componentName that needs to be updated.
Use the folder name as the value.
//Replace 'timeflow-siteapproval' with the name of your microservice folder.
let componentName = 'timeflow-siteapproval';
Update bitbucket-pipelines.yml
Need to add the micro front end to the deployment script. Use the following template and place at the bottom – make sure the indent is under branches:
    {microfrontend}-dev:
      - step:
          name: Deploy {microfrontend} to AWS DEV
          deployment: test
          caches:
            - node
          script:
            - unset NPM_CONFIG_USER
            - cd {microfrontend} && npm install
            - npm run compile
            - node func/deployS3.js $AWS_ACCESS_KEY $AWS_ACCESS_SECRET $AWS_S3_BUCKET {microfrontend}
Deployment
Commit code to development.
Create branch or create a PR to an existing branch.
No additional AWS configuration required.