
This guide is preparing the first group of staff members to be able to create timesheets via Field Flow.
It does not get into detail with customising options for different staff members, setting up allowances or creating calculations for payroll.
The purpose of this guide is to ensure that staff members can fill in timesheets.
Assumptions
- This guide makes no assumptions of the steps created in the onboarding process – it will assume you will need to create everything from scratch.
- The logged in user has Dashboard access to all the items below.
- There is at least one existing employee with a login – the logged in user – so creating an employee is not detailed in this guide.
- The guide does not have to be done in the order below, however you will need to go back and forth between pages to adjust settings.
Setting up Databank
Create Employees and Contractors
Note: This guide will not get into the detail of creating staff.
This guide will get into detail of configuring staff for Timesheets towards the end.
Go to https://dashboard.remoteflow.app/databank/employees to create Employees.
Go to https://dashboard.remoteflow.app/databank/contractors to create Contractors.
Create Team
Go to https://dashboard.remoteflow.app/databank/teams to create a new Team.
Click Create
- Enter in the Name – if it’s the first Team, All Staff is highly recommended
- Select a colour
Once a team is created, select all the Employees and Contractors.

If an employee will be approving timesheets, add them into Managers as well.
Setting up Timeflow data
Create Time Rates
Go to https://dashboard.remoteflow.app/timeflow/timerates to create a new Time Rate.
Click Create
- Enter in the Name – if it’s the first Time Rate, Normal is highly recommended
- Leave Rate Type as Ordinary
- Leave Rate Multiplier as 1
- Check Active
Repeat for as many Time Rates as required – e.g. Overtime
Create Schedule Types
Go to https://dashboard.remoteflow.app/timeflow/scheduletypes to create a new Schedule Type.
Schedule Types are displayed on the app within the Timesheet form like the below.

Click Create
- Enter in the Name – if it’s the first Schedule Type, Normal is highly recommended
- Description is optional – it will show up in the app
- Select the Time Rate previously created
- It is possible to link multiple Schedule Types to the one Time Rate – the hours will be combined when calculating Payroll Reports
- Select Future Schedule
- Select Job Required
- Select all Weekdays
When the Schedule Type is created, assign the Team(s) you created earlier on to the Schedule Type. This will ensure that the staff members can select the Schedule Type on their timesheets.
Repeat for as many Schedule Types as required.
Create Pay Period
The Pay Period is how often the staff will be paid.
Go to https://dashboard.remoteflow.app/timeflow/payperiods to create a new Pay Period.
Click Create
- Enter in the Name
- Select Period
- Select Start Day
- Check Active
Configuring Staff
Each staff member will need the below settings updated for Field Flow (mobile app) access to timesheets.
Note: The settings may look slightly different between employees and contractors.
Info

Make sure the staff member is active.
Login
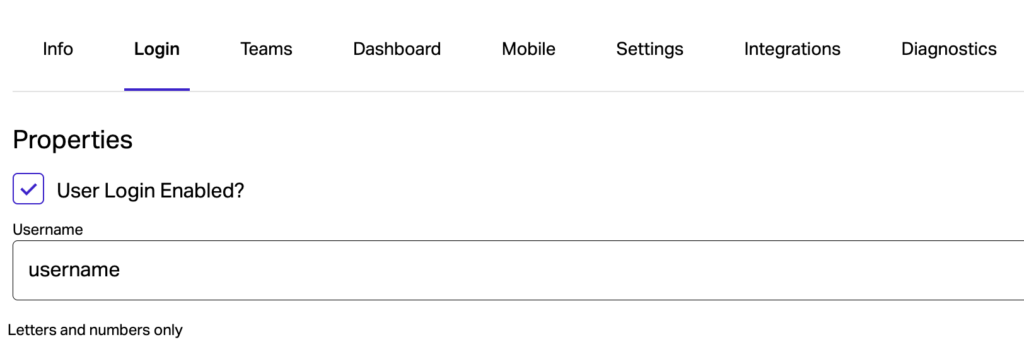
- User Login Enabled checked
- Username entered
Teams
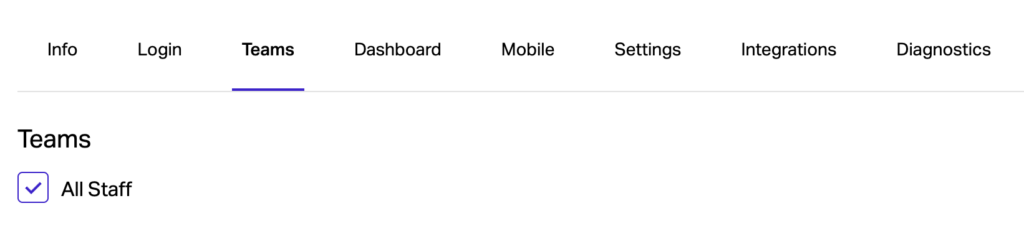
- Make sure the staff member belongs to the team that was created earlier
- OR the staff member belongs to the team that has been assigned to the Schedule Type(s)
Mobile
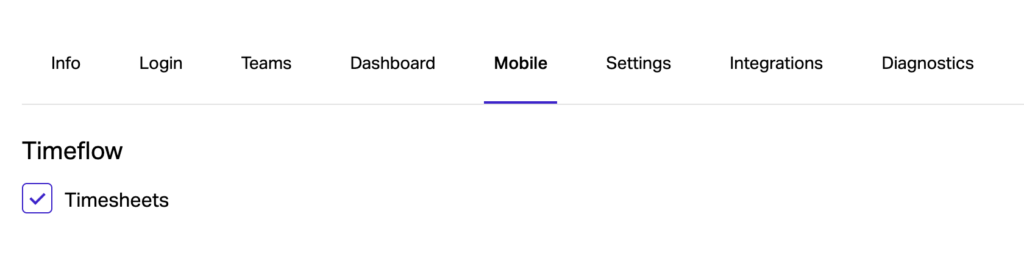
- Timesheets checked
Settings

- Choose the Pay Period created earlier
- Choose the Team that has been assigned to the Schedule Type(s)
- Create Timesheets with Job Search checked
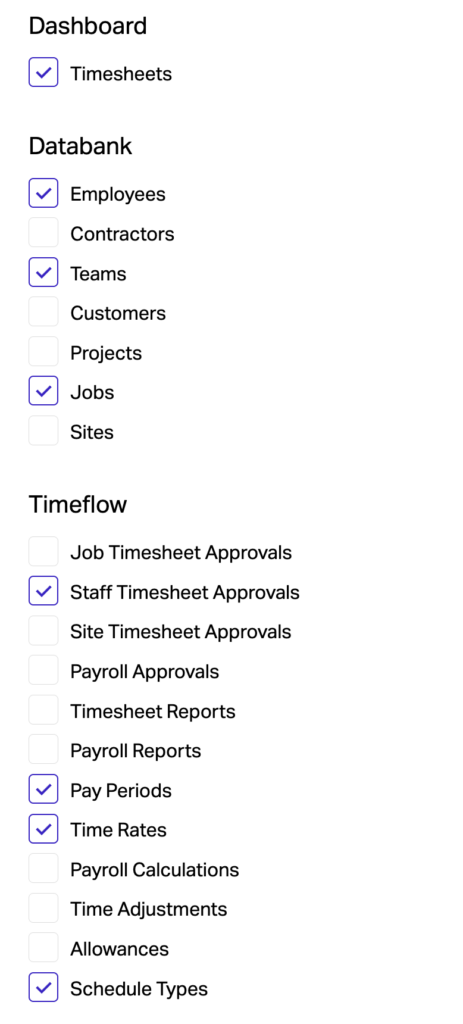
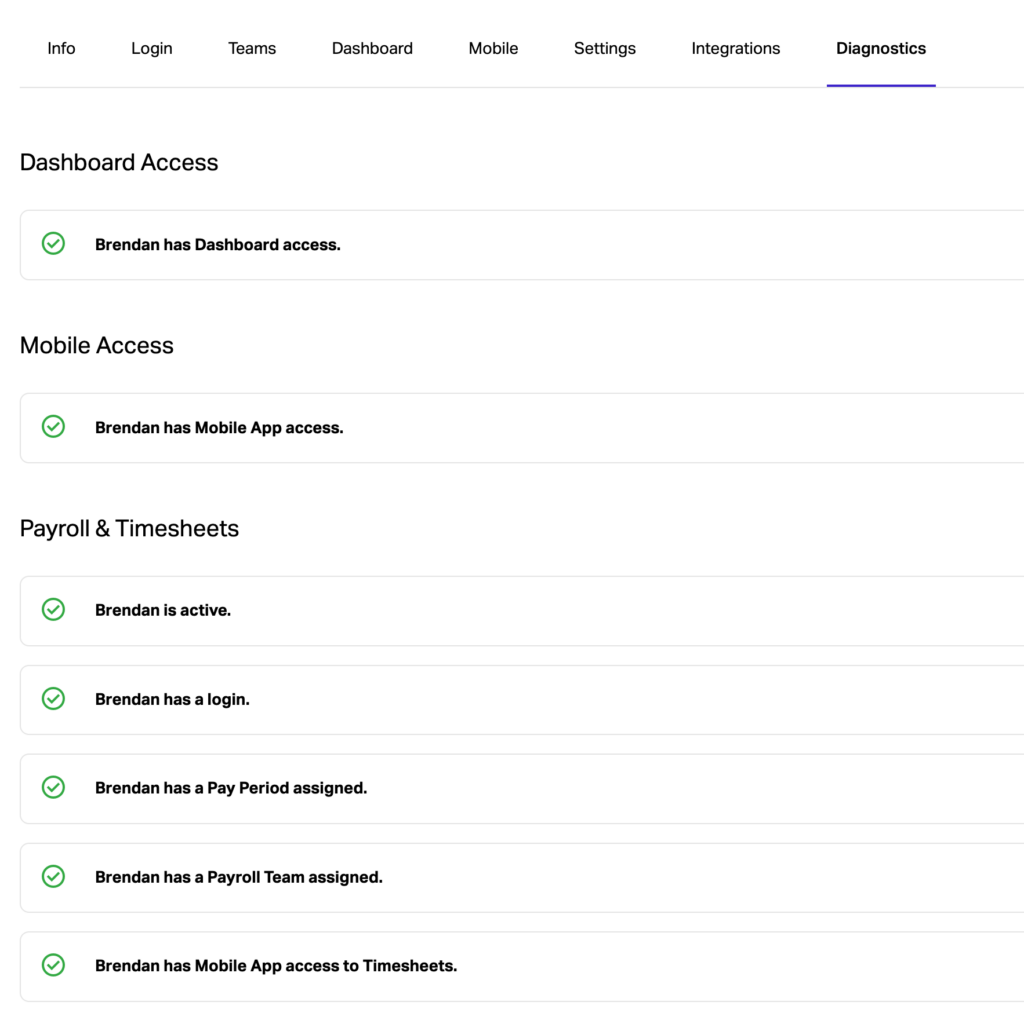
Diagnostics
Use the diagnostics to check your settings. The typical settings for an employee should have the below ticked.
Repeat for each staff member and if you know the password, test the login on the mobile app.